Discover the steps to install garage door weather stripping, which helps save energy and keeps out wind, rain, and dust. A step-by-step guide is included!
Weatherstripping might seem small, but it makes a big difference. It seals the sides and bottom of your garage door to keep out wind, rain, bugs, and dirt, helping your garage stay cleaner, drier, and more comfortable all year.

It also helps lower your energy bills by blocking outside air. Your garage stays warmer in winter and cooler in summer, protecting your car, tools, and anything you store inside from extreme temperatures, moisture, and pests. It’s a simple fix with big benefits for your home.
If you want to know how to install garage door weather stripping, it’s not hard. You just need a few tools and some time. Measure your door, remove the old strip, clean the surface, and attach the new one. You can also call Alachua Garage Door for help.
What Is Garage Door Weather Stripping
Garage door weather stripping goes along the edges of the door to seal small spaces and block drafts. It helps stop rain, wind, dust, and bugs from getting inside and keeps the garage warmer in winter and cooler in summer.
There are different kinds of weather-stripping materials. Some common ones are rubber, vinyl, foam, and metal. Each one works differently. The best choice depends on your garage door and the kind of weather in your area.
Types of Weather Stripping Materials
Here are the common types of garage door weather stripping materials:
Rubber Seal
Rubber seals are strong and bend easily. They close the gap at the bottom of the garage door, avoiding rain, wind, and bugs. Rubber lasts long and works well in hot or cold weather, making it a smart and common choice.
Vinyl Seal
Vinyl seals are tough and great for wet or cold weather. They don’t crack easily, even in freezing temperatures. Vinyl is easy to clean and has been working well for years. It’s a good choice if you want strong weather protection for your garage.
Foam Seal
Foam seals are soft, light, and easy to put in. They’re suitable for filling small gaps and stopping drafts. The foam also helps block noise and keep the garage warm. It’s an easy and budget-friendly way to keep your garage more comfortable year-round.
Brush Seal
Brush seals have strong bristles that remove dirt, dust, bugs, and leaves. They work well on the sides and top of the garage door. The bristles move with the door, so they last long and don’t get in the way when you open it.
Metal Seal
Metal seals are used as a base for other materials like rubber or vinyl. They strengthen the seal and help everything stay in place. Metal lasts long and supports your garage door’s bottom or sides.
Tools and Materials for Garage Door Weather Stripping
Installing garage door weather stripping is a simple way to keep out dirt, water, and cold air. The job becomes much easier with the right tools, products, and safety steps.
1. List of Essential Tools
- Measuring tape: Used to accurately check the width and height of your garage door.
- Utility knife: To cut weather stripping to size
- Screwdriver or drill: For fastening strips securely
- Hammer and nails or screws: To hold the bottom or side seals in place
- Adhesive: For some peel-and-stick types
2. Recommended Weather Stripping Products
- Rubber bottom seals: Strong and flexible for sealing gaps
- Vinyl door stops with integrated seals: Great for top and sides
- Brush-style seals: Helpful in blocking dust and bugs
- Foam strips: Simple option for sealing smaller gaps
3. Safety Precautions to Consider
- Use a stable ladder on level ground.
- Keep the garage door fully open and locked.
- Wear gloves to protect your hands.
- Stay away from springs and cables.
- Work in a well-lit area.
How to Prepare for Garage Door Weather Stripping Installation
Before installing a new garage door weather stripping, proper preparation is key. These simple steps help make sure the new seal fits right and sticks well for long-lasting results:
1. Measure Your Garage Door
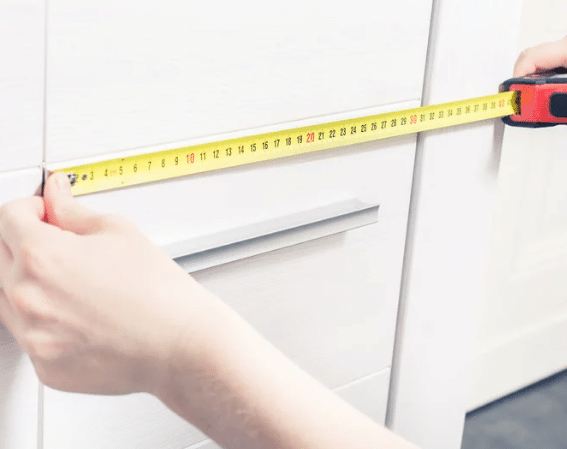
Start by using a measuring tape to check the width and height of your garage door. Measure the bottom, top, and sides. Write down the numbers. These accurate measurements will help you cut your new weather stripping to the right size for a good fit.
2. Remove Old Weather Stripping
Carefully take off the old weather stripping from the garage door. Use a flathead screwdriver or utility knife to lift it off. Remove any nails, screws, or leftover pieces. Be gentle to avoid scratching or damaging the door’s surface while you clean things up.
3. Clean and Prep the Surface
Wipe the area where you’ll install the new weather stripping. Use a damp cloth to clean off dust, dirt, and any leftover glue. Let everything dry before moving forward. A clean, dry surface helps the new weather stripping stick better and last longer.
Steps on How to Install Garage Door Weather Stripping
Here’s a simple, step-by-step guide on how to install garage door weather stripping. Follow each step carefully to improve your garage’s insulation, block pests, and remove dirt and water.
Step 1: Cutting the New Weather Stripping to Size
Lay the weather stripping flat on the ground. Measure it based on the size of the door. Cut each piece to fit the bottom, top, and sides. Ensure each strip is the right length so everything fits well during installation.
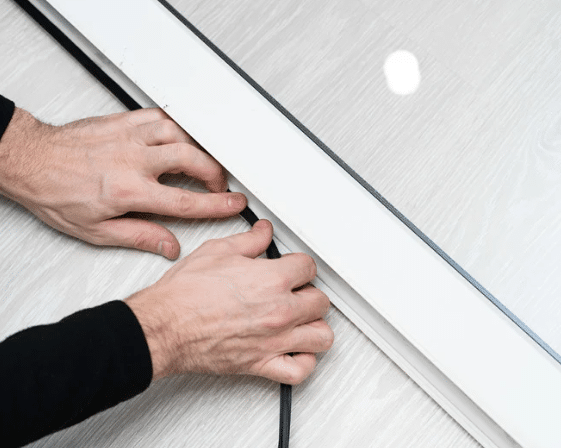
Step 2: Attaching the Weather Stripping to the Bottom of the Door
Place the bottom strip along the lower edge of the garage door. Line it up straight and press it in place. Use nails, screws, or strong adhesive to attach it. The strip should sit tight against the floor to keep out air and water.
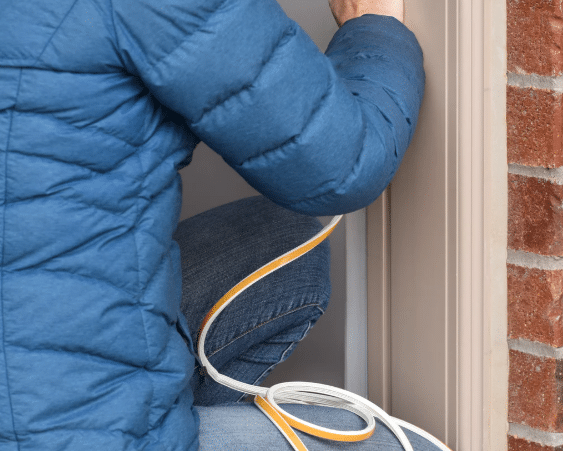
Step 3: Securing the Sides and Top with Appropriate Fasteners
Line up the weather stripping on the door’s sides and top. Use nails, screws, or staples to fix each strip in place. Press them down gently as you go. Ensure there are no loose spots so the seal works properly.
Step 4: Ensuring a Tight Seal and Making Necessary Adjustments
Once everything is in place, check the seal by looking along the edges. Adjust the strips or reattach if you see small gaps or loose areas. A tight seal helps keep your garage safe from wind, dirt, rain, and insects.
Step 5: Testing the Door’s Operation Post Installation
Open and close the garage door a few times to check its movement. It should move smoothly without sticking or dragging. If you notice any tight or uneven spots, fix them right away. A proper garage door installation helps the weather stripping stay secure and work well.
What Mistakes to Avoid When Installing Garage Door Weather Stripping
Installing garage door weather stripping can improve insulation, but simple mistakes can lead to poor results. Here are common issues to avoid:
Wrong Measurements
Measuring the garage door wrong can leave gaps that let in cold air, rain, bugs, and dust. Be sure to measure the width and height again before cutting the weather stripping. A proper fit helps seal the door tightly, protecting your garage and saving energy.
Wrong Material

Not all weather stripping works for every garage door. Using the wrong type can cause poor sealing and faster wear. Choose a material that matches your door style and local weather. This helps it last longer and keeps your garage well-sealed in all seasons.
Dirty Surface
The new weather stripping won’t stick properly if the door surface has dust, dirt, or glue. Wipe the surface using a damp cloth, then wait for it to dry completely. A smooth, clean surface helps the strip stay on longer and work better against weather and pests.
Too Tight
Tightening screws or nails too much can bend the seal or damage the frame. Press just enough to hold the strip in place without crushing it. A firm but gentle hold helps avoid cracks, keeping the seal in good shape for a long time.
How to Maintain Garage Door Weather Stripping for Long-lasting Results
Taking care of your garage door weather stripping helps it last longer and protects your garage. Follow these simple tips to keep the seal in good shape and working well:
Regular Inspection Schedules

Look at your garage door weather stripping every 3 to 6 months to see if it’s still okay. Look for cracks, gaps, or damage. Catching problems early helps stop bigger issues later. Regular checks help your garage stay sealed and protected from wind, rain, bugs, and dirt.
Cleaning Methods to Prevent Wear
Use a damp cloth to clean off any dirt or dust from the weather stripping. Do not use strong cleaners, as they can damage the material. Cleaning it often helps it stay soft, flexible, and strong, so it keeps sealing your garage properly.
When to Consider Reinstallation
Replace the weather stripping if it is cracked, loose, or flexible. A worn-out seal lets in air, water, and pests. Putting in new weather stripping keeps your garage safe, clean, and protected in all kinds of weather.
Benefits of Professional Garage Door Installation
Getting help from a professional ensures the work is done properly the first time. With the proper skills and tools, they ensure everything works smoothly and safely, helping prevent future problems that could cost more time and money.
You’ll also save time. A trained garage door installer works quickly and efficiently, handling tasks that might take hours if done on your own. This makes the process less stressful and prepares your garage door faster.
Many services, including how to install garage door weather stripping, come with warranties or service guarantees. If anything goes wrong, you’re covered, giving peace of mind and long-term value.
Frequently Asked Questions
How to Put Up Garage Door Weather Stripping?
To put up garage door weather stripping, clean the edges of the door first. Then, cut the strip to the correct size. Press or nail it along the top and sides of the door. This helps block wind, dust, and rain from coming in.
How Do You Install Door Weather Stripping?
To install door weather stripping, take off the old strip first. Measure each part of the door and cut the new strip to fit. Stick or screw it in place. This helps keep air and water out and makes your garage more comfortable.
Do Garage Doors Need Weather Stripping?
Yes, garage doors need weather stripping. It keeps cold air, bugs, water, and dirt out. It also helps save energy and keeps the garage warmer. Replacing the strip if it is old or damaged is a quick way to fix those problems.
How Do You Cut Weather Stripping on a Garage Door?
To cut garage door weather stripping, measure and mark how much you need. Then, use a sharp knife or scissors to cut it. Cutting it the right size helps make a tight seal and keeps outside air and water from getting in.
What Is the Weather Stripping Around a Garage Door Called?
The weather stripping around a garage door is called a garage door seal. There are bottom seals, side seals, and top seals. These parts help close gaps and stop wind, rain, bugs, and dust from entering the garage.
Conclusion
Weatherstripping may seem small, but it brings big value. It removes dust, rain, bugs, and outside air, helping your garage stay clean and comfortable. It also helps lower energy bills and protects everything you keep inside year-round.
We handle the job from start to finish. Whether you’re learning how to install garage door weather stripping or want it professionally done, we’re ready to help. We use the right tools and materials and do the job right the first time to ensure your garage is sealed properly.
Call 386-418-0100 today to schedule your service. Alachua Garage Door makes your garage more secure, energy-efficient, and protected. One simple upgrade can bring comfort and long-term savings; we proudly offer that to every homeowner we serve.
End Note
We offer reliable garage door services designed to keep your home or business safe and working right. From expert garage door installation in Alachua County to fast garage door repair in Levy County, FL, every job is handled with care, skill, and great attention to detail.
You can explore our recent work through the photo gallery and use the Design Your Door tool to create a style that fits your space. We also provide long-lasting roll-up doors and high-quality Amarr products that offer strength, security, and a great look for your property.
To learn more, visit our About page and get tips from our blog. You can also find us on Facebook, Instagram, and Google Maps. If you have any questions, reach out through our contact page or visit Alachua Door Company.


